Recipes             Menus              Entertaining             About

Starred Recipes

3 Stars - A Family Favorite
2 Stars - Really Good, Will Make Again
1 Star - Good Recipe, Probably Won't Make Again

February 27, 2012

Red Quinoa and Edadame Salad

Reluctant Entertainer's
Red Quinoa and Edamame Salad

I saw this recipe on Sandy's blog and realized I had most of the ingredients on hand.
I modified Sandy's recipe slightly.
We ate a little bit of the salad, but I'm taking the majority of it to a get together tomorrow night.

David's not a huge quinoa fan, but we all really like edamame.
Surprisingly, the boys really liked this salad.
I did too!

This salad is chock full of protein, fiber, and nutrients.


It's very simple to assemble.
Start by cooking 1 cup of quinoa in 2 cups boiling water as you would rice.

Then toss together with thawed edamame.
Season with an oil dressing and serve at room temperature.


I really like how different it is.
Really, really good!

Double click to print as a 5x7 recipe card.

Bon Appetit!

Roux-Based Gumbo

Gumbo (Roux-Style)

When we were in New Orleans at Christmas, Brennan discovered Gumbo and couldn't get enough.
I think he ordered it at every meal.

I like my mom's Gumbo recipe that is tomato-based that I will make for the family soon and share here.
But Brennan was introduced to the roux-based variety in New Orleans, so I decided to make it for him yesterday (with his help of course).


The old joke goes:
Betty:  I'd love your jambalaya recipe.
Thelma:  First you make a roux...
Betty:  Never mind.

I don't have a lot of patience for making roux on the stove, so I was thrilled to discover Alton Brown's oven-based roux!  I made it for yesterday's Gumbo and it was perfect.


I picked up Gumbo Filé (ground leaves of the sassafras tree) and then read that you use Filé OR okra in Gumbo to thicken it.  Since Gumbo without okra is like a day without sunshine, I made it with okra and served the Filé on the side.  But, it isn't necessary for my recipe below.

You start with Alton's Roux.
Simply mix the flour and oil together and put in a baking dish.  This pie plate was perfect.
Then bake at 350 for an hour.


It comes out perfect and you're ready to put it in your pot to start the Gumbo.
(If you like your Roux darker, then leave it in the oven up to 15 minutes longer).

Add your vegetables and cook for 10 minutes.
Then add sherry and combine well.
If you don't want to use sherry you can just add more broth.
Then add your broth, herbs, spice, crab meat, and Worcestershire sauce.
Simmer for 30 minutes uncovered.


Then add your thawed okra (frozen that's been thawed works really well as a thickener).


Then add your shrimp and heat through.
I tossed the shrimp in a little Old Bay Seasonings before adding them to the Gumbo.

I made a big pot of rice.
The only other condiments were the Gumbo Filé and Tabasco.

I like my Gumbo with a lot of rice.

If you prefer yours like a soup, just use more broth.

You'll notice we didn't even bother to remove the bay leaves - we were all anxious to get to the Gumbo.
I figured we'd just treat it like the baby in the King Cake!
I was a winner!

This Gumbo as a huge hit yesterday. 
I'll certainly be making it again and again.

As with any soups there are endless combinations. 
I'll probably add chicken or sausage next time, but it certainly doesn't need it.

Double click to print as a 5x7 recipe card.
Bon Appetit!

February 26, 2012

Vegetable Spring Rolls

Vegetable Spring Rolls

I was pretty sure I was going to keep this recipe to add to my FAIL list, but it ended up being surprisingly OK, which is why I don't have a great after photo.

I love, love, love Spring Rolls.
I had my first Spring Rolls in Hawaii - my friend's mom was Vietnamese and would make them a lot, from vegetables and herbs (like mint) from her garden.
I have made lots of Egg Rolls, but had never tried Spring Rolls, so picked up a packet of Spring Roll Skins to try my hand.


Once we sat down to lunch, I reminded the family that (like always) I appreciated them trying the new dishes I was making, but they could help themselves to a peanut butter sandwich if they didn't care for the meal.  I was already planning my own peanut butter sandwich.

Surprisingly - everyone liked the Spring Rolls. 
David even said he thought he liked them better than Egg Rolls.  Well, what do you know?

My main concern with Spring Rolls was that I found conflicting information online about how to prepare them.  Basically - do they need to be cooked after assembling?

A couple of sites said they did, so I fried them like Egg Rolls.
Then I found a couple of recipes where you don't cook them after assembling.

Bottom line - I'm trying them again, following different recipes, to see if I can come up with an even better way to make these.  But for now, he's how I made:
Batch #1 of Vegetable Spring Rolls.

I started by asking my helper to make a delicious filling.
We sauteed cabbage, carrots, and chopped garlic in a little olive oil until it was tender.
Then we added left over Chana Dal and cooked Japanese noodles.


As with our recent Egg Roll recipe, Brennan then added a mixture of corn starch, molasses, and soy sauce to the vegetables and combined it well.


Our filling was ready.

Spring Roll skins are made from rice flour, where Egg Roll wrappers are made from wheat, water, and eggs.  They need a little extra prep before they're ready to use.

Aren't they cool?

You prep them by soaking them for a minutes in hot water.
One website recommended a pie plate, perfect.

Can you see it in there?


Then we placed them on a paper towel to fill.

They tear easily so you have to be careful.
You just fill and roll them up like an egg roll.

At this point, according to some online recipes, you can eat them as is.
I'm not so sure - I plan to do more investigating.

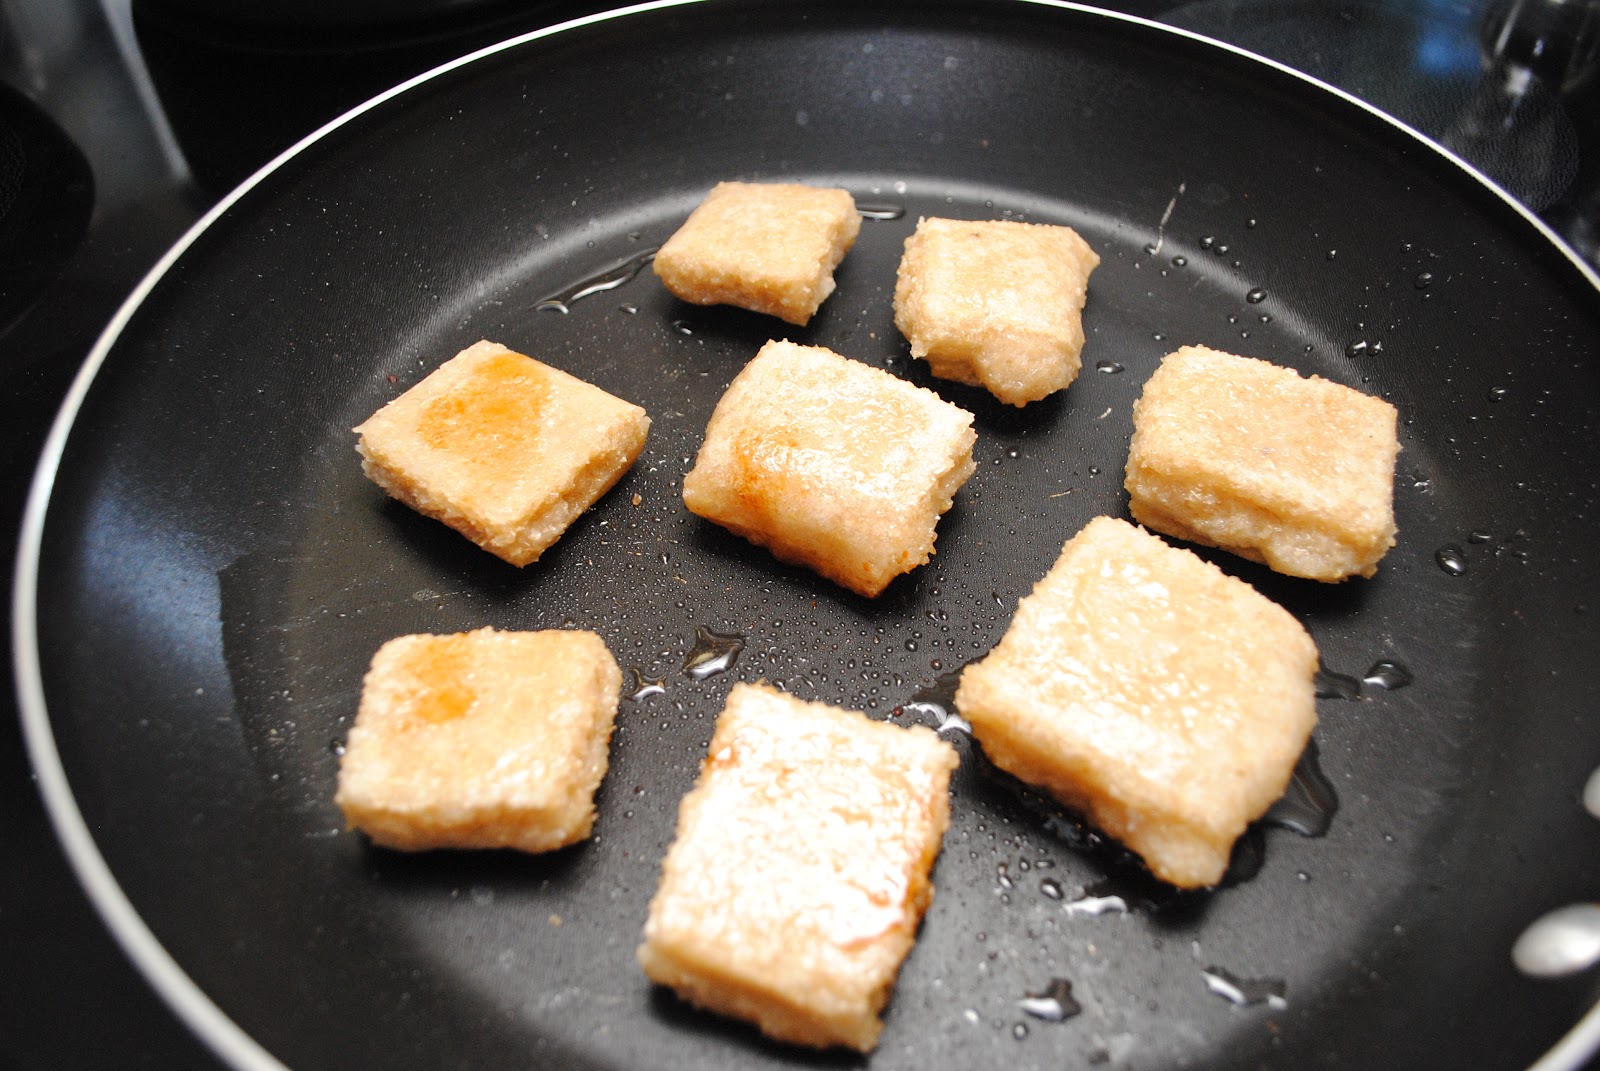
But we cooked them in olive oil on the stove and served them with soy sauce and Sweet and Sour Sauce as we did egg rolls.  I was surprised but they were actually very good.

Again, no great after shots here, because they seemed like quite a mess to me as we were cooking them.  But looks can be deceiving, apparently!


You can add a variety of cooked meats, vegetables, noodles, grains, rice, and seasonings to your filling.
The combinations are endless - which is half the fun.

Double click to print as a 5x7 recipe card.

Ăn ngon nhé
Vietnamese for Bon Appetit!


Vegetable Fried Rice

Vegetable Fried Rice

A dish that is always popular in our house is any kind of fried rice.
I had a lot of vegetables on hand so made up a big dish of Vegetable Fried Rice with Brennan yesterday.
It was really good.

I started by heating a little sesame oil in the frying pan and chopping up some Daikon radish and garlic to cook for 3 minutes.
I used a mandolin to slice 3 carrots and cook them as well.
Then I added a pinch of salt and let the vegetables saute for a few minutes.


I like brown rice, but my family doesn't, so I cooked 1 c of white rice (it makes 3 cups of rice) and then added it to the vegetables.

I drizzled 3 Tbsp of water on top, along with soy sauce and rice wine vinegar.
I tossed it and let it cook for 10 minutes or so.


Just before moving to a serving bowl I added some chopped broccoli and let it cook for a couple of minutes.

It was good re-heated for dinner as well!

Other great ingredients could be:
**Shrimp or Chicken
**Water chesnuts
**Bamboo shoots
**Scrambled egg
**Edamame
**Scallions
**Cabbage
**Peas


Double click to print as a 5x7 recipe card.


食飯
sihk faahn
Cantonese for Bon Appetit!


Daikon and Carrot Pickles

Vietnamese Daikon and Carrot Pickles

So my guess is you're not thinking this dish sounds all that delicious?
It really is though!

Homemade refrigerator pickles are supposed to be really good for your immune system.
Many vegetarians, vegans, and others on medically-recommended diets (like those recovering from chemo) eat them daily.

I made up a jar and we've all been eating them for the past couple of days.
I've never made cooked pickles before (through the canning process), so I was happy to see how easy this refrigerated pickles recipe was.

This version is traditionally Vietnamese.  I modified several recipes I found on various recipe sites.

You start by julienning 3 carrots and Daikon radish and placing them in a bowl.

Sprinkle 2 tsp of sugar and 1 tsp of salt over the vegetables.  Toss them until they are tender enough that you can bend a piece of Daikon without it snapping.  It took about 5 minutes.


Then place the vegetables in a collander and rinse and drain them well.
In the bowl add 1/2 c sugar, 1 c white vinegar, and 1 c warm water.
Mix it well to dissolve the sugar.

Pack the vegetables in a clean glass jar and pour the vinegar mixture in.
Seal and refrigerate 24 hours before eating.


I am sure you can substitute a sugar alternative for the real sugar in this recipe, but I just followed the normal directions. 

Ways recommended to enjoy the pickles:

**In place of coleslaw or sauerkraut
**As a side dish with your meal
**On pork or beef sandwiches
**Chopped up in fried rice
**Chopped up on a salad
**In a spring roll

Double click to print as a 5x7 recipe card.


Ăn ngon nhé
Vietnamese for Bon Appetit!

February 25, 2012

Chana Dal

Chana Dal
(Bengal Gram Dal)

Recently I picked up a bag of legumes that I had never seen before but thought would be fun to try out.
I found Chana Dal in the Indian section at Jungle Jim's International Market in Cincinnati.
Thanks to Google, I knew I could find a recipe or two for this yellow looking pea.

I did, indeed, find lots of recipes online for Chana Dal, and many many blogs and website talking about the great nutritional value (it's a 5 on the glycemic index!) of this cousin to the chickpea.

I married several recipes to come up with my own version of Chana Dal.
It is absolutely delicious!
source

You start by soaking a cup of Chana Dal in water for 2 hours.
Drain and pick through.

Then boil 3 c of water on the stove and add the Chana Dal.  Cook on low for 30 minutes.
Then add spices and simmer.

Heat a little oil in a small frying pan and add mustard seeds and garlic.

Too much oil here.

Once the mustard seeds have popped and the garlic has lightly browned, add all to the Chana Dal.

The boys thought it was corn while I was cooking it.
Does look like it with the turmeric added!


I served the Chana Dal with Pappadam that I also picked up at the store.


They're like little Indian tortillas, made from lentil and rice flours.
You dip your fingers in oil and smear a little on each Pappadam and then microwave them for 50 seconds to make them softer and easier to fold up.


The Chana Dal was delicious.  Everyone in the family liked them, and so good for you!
The Pappadam were OK but I'd like to experiment with other ways of using them.

I could see using Chana Dal in a variety of ways:  plain, as a dish with rice, as a side dish with a curry, in egg rolls...


Double click to print as a 5x7 recipe card.

आप का खाना स्वादिष्ट हो
(āp kā khānā svādiṣṭa ho)
Hindi for Bon Appetit!

February 21, 2012

Homemade Vegetable Broth

Mary's Homemade Vegetable Broth

I make a lot of soups and I always use chicken broth. 
I usually use Knorr brand because I really like the flavor and I always have it on hand. 


 But whenever I'm on the lookout for a good vegetable broth, I'm always struck by the high cost. 
Really - shouldn't vegetable broth cost less than chicken or beef broth?  And that's if you can find it.

So my friend Mary shared her vegetable broth recipe with me and I adapted it and wanted to share it with you today.  I even purchased BPA-free plastic containers for the freezer.  I'm loaded up and set for my first use!


You start by sauteing in a little olive oil any vegetables you have on hand.
I think I'll make broth whenever I have vegetables that need to be used up.
The beauty is - you can include any hearty vegetables you like.
I list some possibilities from the original recipe at the bottom.


This time I sauteed a peeled potato, 2 large carrots, some leftover broccoli, 2 celery stalks, a big chunk of Daikon radish, and some burdock root along with 3 whole cloves of garlic.

Per the recipe I added a bay leaf and 10 peppercorns and let the vegetables cook.
Then I added 12 cups of water and let it boil, then simmer for 1 hour.

Then I added Soy Sauce and a little salt for flavor and let is simmer another 20 minutes.


I strained out the vegetables and loaded up my delicious broth in the freezer for future use!

Vegetable Suggestions:
Onion
Celery
Carrots
Parsnips
Tomatoes
Tomato Paste
Broccoli
Russet Potato
Sweet Potato
Leeks
Mushrooms
Peppers
Turnips
Greens
Zucchini
Fennel

*I would recommend using at least 4 vegetables for a rich taste.
*I would avoid adding leftover purple cabbage because the broth turns an ugly color (true story).

Double click to print as a 5x7 recipe card.


Enjoy!


Mochi - 3 Ways

Mochi

When I lived in Hawaii there were many, many times when I had the chance to attend pot lucks where the most delicious food was shared.  Even in high school - it seems like we had all sorts of parties and parents sent in food.  One of my favorite sweet treats was Mochi.

A classmate who was of Chinese descent always brought it in - his mom was tickled that I liked it so much.  When I started reading about this treat recently, I had to try my hand at it.  Luckily, I found Mochi at Jungle Jim's last week.

The Mochi that I had in Hawaii often looked like this.

With food coloring added - but the ones I tried were usually in squares.
Mochi is a Japanese dish made from rice and is often served sweet.

Here I'll share 2 sweet and 1 savory Mochi dish that I tried for the family last night.


I started by cutting the Mochi into 12 rectangles so we could each try the 3 ways of cooking.

For one sweet and one savory dish, they are cooked on the stove in a couple of tsps of olive or sesame oil.


Once they are cooked for 5 minutes or so on one side, you turn them over to cook on the other side.
For the 4 savory ones I added a drop of Soy Sauce to the top of each one (see up front).

I placed the other 4 sweet ones on a cooking sheet and cooked them for 7 minutes at 450*.
Very puffy when they're done.

The two sets of sweet Mochi I placed in serving dishes and drizzled a sweetener on top.
In this case I used Brown Rice Syrup.
You could use agave or maple syrup or any sweetener.

For the savory ones I followed The Kind Diet recipe and wrapped them in Nori with a little bit of Daikon radish.

So Mochi 3 Ways - Savory with Daikon and Nori, Sweet on the stove top, and Sweet in the oven.


I'm new at working with Nori but I can tell you the savory one was my least favorite. 
The radish was great but the Nori was overpowering. 

I liked the puffy oven-cooked one the best!

Double click to print as a 5x7 recipe card.


どうぞめしあがれ
(douzo meshiagare)
Japanese for Bon Appetit!